Tuesday, March 31, 2015

Kauai Classic


I am on the Swim Kauai Aquatics swim team, and recently we had our annual Kauai Classic swim meet. The Kauai Classic is the biggest meet of the year hosted by my team. It's always a blast because it's a fun meet and it's two days long. 

All of my friends and I made huge time drops and improved in almost all of our swims! Swim teams from Canada, California, and Oahu come to race in the meet!

It's fun meeting swimmers from all over the world and racing with them. The pool is very crowded when other teams are visiting, but it's all worth it! On the Friday before the meet, we had a potluck at the pool with the Canadian team.

 We participated in relays competing against the other teams, and we won! After the last day of the meet, we went to kalapaki beach and hung out for the rest of the day.  

Friday, March 13, 2015

Typography Images

What are Typography Portraits? Typography portraits are a picture of some body's face, with text that makes up their face. The text is color coated to make the colors match the original picture. When we made a typography portrait of an innovator, we got the portrait from Google images, and we got the text from a Wikipedia website about the certain innovator.

Images can make a lasting impact on people a few different ways. One way to make a lasting impact using a Typography portrait is to be able to relate to the picture and text. For example the emotion in a picture could be ratable, along with the words and colors blend with the picture.

My biggest challenge during the process of making the image was being able to follow instructions and finish in a timely manner. It was easy for me to get stuck by not knowing how to do something, and also messing it up by little mistakes I didn't notice which caused me to have to start over. I overcame these issues by referring back to the tutorial when I was lost. I got confused doing the cropping and it was hard to prevent small mistakes, but once I got the hang of it, it was super fun!


This is my innovator typography portrait, using the first tutorial. I used a picture of Michael Dell, the CEO of Dell computers. I used Wikipedia text that I found about him on the internet.


This is my Teacher typography intermediate portrait. I interviewed Mrs. Washington and asked her what words describe her, and I used those words for the text.


This is my Final finished typography advanced tutorial. The words I used were Love, Sports, and Courage.

Wednesday, February 25, 2015

Double Exposed Portraits

Portrait photography is a photo of a person, usually focused on their face, that shows expression and the mood of the photo. Portrait pictures are not always of people, or somebody's face. Portrait pictures can be of any object. Profile view is a photo of the side of a persons face, where you can't see both eyes. Silhouetting is where you can only see the outline and edges of the subject, and the rest of the picture is black, or one solid color.

Double exposure photos are a profile view of someone's face and head, and inside there are two more texture photos that symbolize you. They are used to include two photos that describe you, or represent something that you like to do. We make double exposed photos to provide two photos that explain you, or something you like to do. We make double exposed photos like this:


  1. Take your amazing profile view portrait photo, and two texture photos that represent you.
  2. Open photoshop< File< Load files into stack< Browse and select your three photos.
  3. You will use the burn tool to brighten you back round until it's white.
  4. Next, you'll crop your images to 8.5in by 11in.
  5. Now, you'll click on each layer, and put the blend mode on screen.
  6. For layer adjustments, you'll do the following: Layer< New Adjustment Layer, then select the adjustment layer you chose to use.
Here is how you Find the Layer effects.

Here is the curves Adjustment Layer I used on my final double exposed portrait. 


Here is my final double exposed portrait. I used the adjustment layers Curves, Saturation, and Vibrance.

Here is my Practice double exposed portrait. I used the Adjustment Layers Curves.


Monday, February 9, 2015

HDR Phototgraphy

HDR photography is when you take numerous pictures of one shot, then blend them together. HDR is short for High Definition Range. The purpose in this is to make it have better lighting. I like that HDR photography balances the brightness, because sometimes when I take non-HDR pictures there is a super bright park, then a dark part.

To take an HDR picture, you take a set of pictures of one object or view. Between each picture, you adjust the exposure. You adjust the contrast by moving the dial on the lens back and forth. You do not move the camera between shots. If you do move the camera between shots, when you go to blend your set of photos, it will be blurry.

HDR has many different functions than regular photography. One of those is that you adjust the exposure after every picture you take. Another is that the pictures come out super bright, or super dark. After they come out, you would usually blend them all together in photo shop.
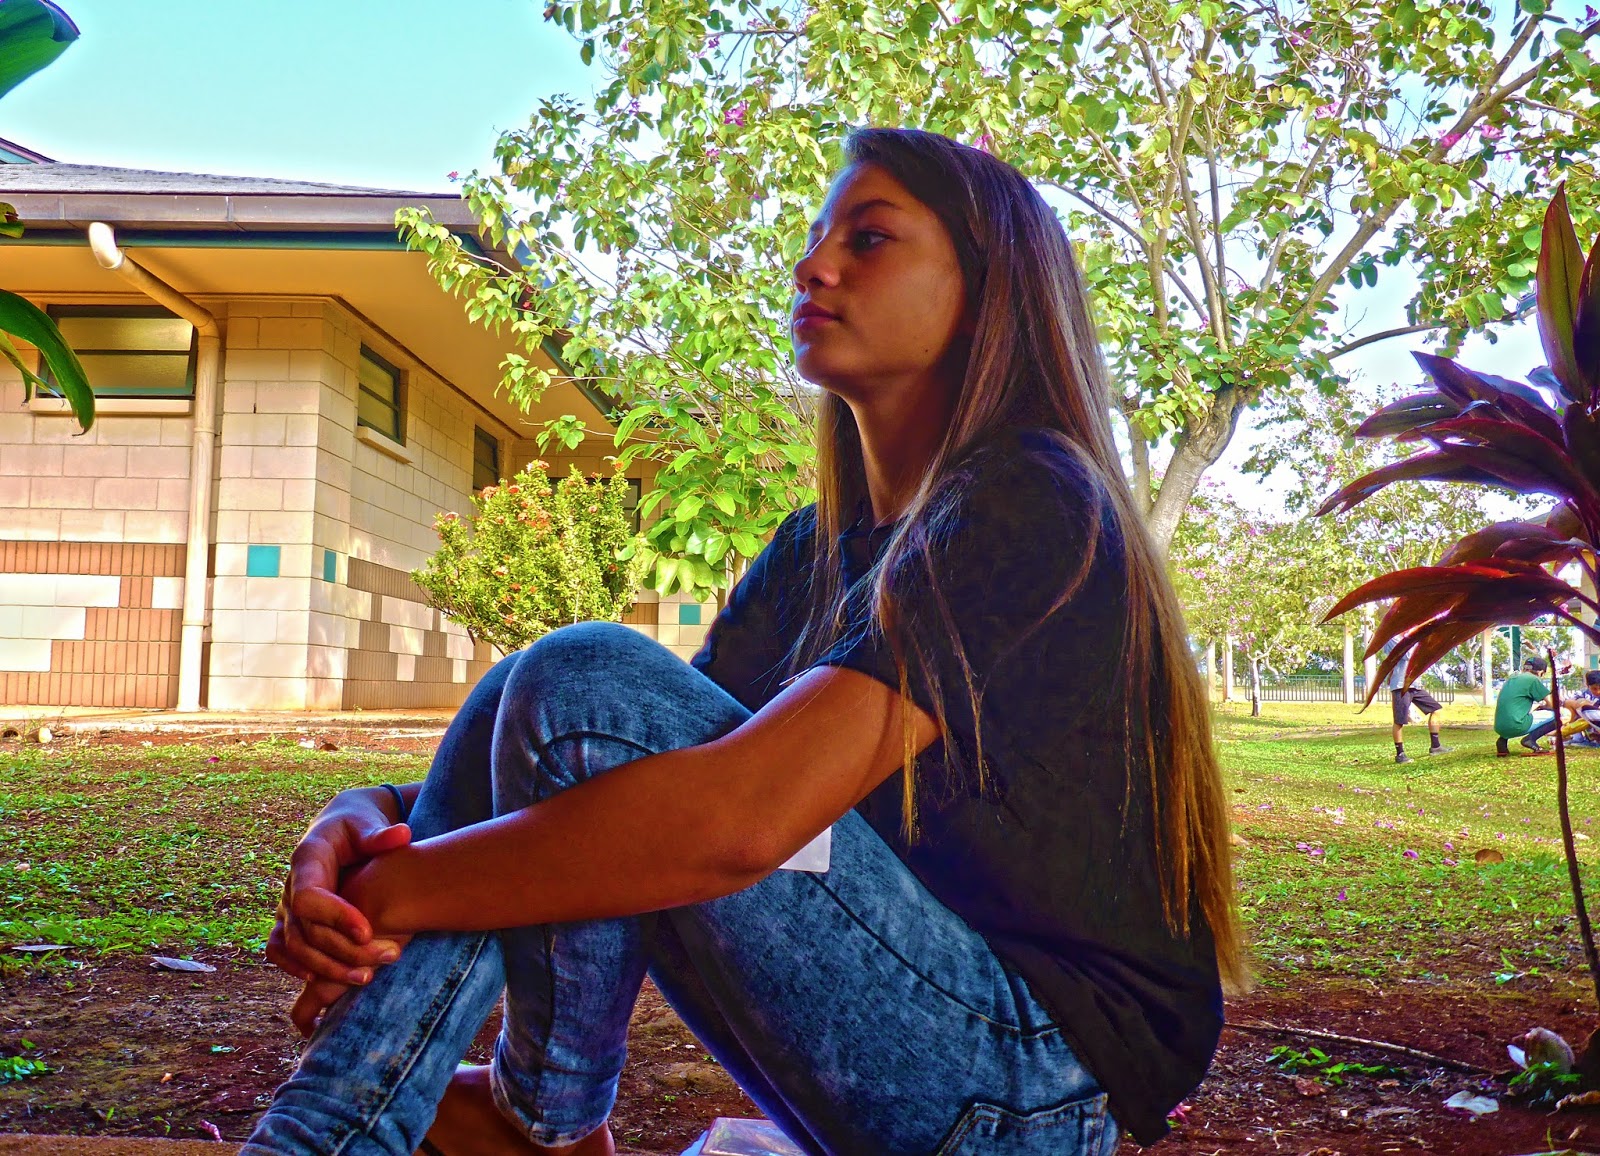
Here is a portrait style HDR picture. I had to make sure the model was completely still because when you take HDR pictures, you have to adjust the exposure. That means that the model has to stay still in a comfortable position. Also, I chose a back round where the building blocked the trees so that they wouldn't move as muck, because if there's movement in the pictures, it will turn out blurry or out of focus.


This is my HDR Landscape photo. I took it in the morning, because I knew there would be great lighting. I put my camera on a stool so that I didn't move I while adjust the exposure. Also, it was good time to take these because there was barely any wind, and wind would move the branches and trees.


This is my Super Impose photo.It is a blended photo of my HDR portrait, and my HDR Landscape photo. We do this because the portrait photo may not have the best back round, and to have an amazing photo, you can take your back round, center it, and trim it. Then you will have a great back round for your HDR portrait. We also chose a creative word that fits with the picture to describe it a bit.


Wednesday, January 21, 2015

Back to School

My favorite moment at KMS was at lunch with Lani and other friends. We talked and watched videos in Mrs. Bandsma's class. Lani was helping me and telling me where my classes were, then we walked around the school. Lani introduced me to some of her teachers and friends also.

My biggest challenge was getting to the right class in time. I didn't want to be late to any classes, so my friend Chelsy helped me, so did Lani and some other friends.

I will pay attention and try my hardest. If I need help, I will ask a classmate and if they can't help me I will ask Mr. Sanderl. I will also try my best to get all work done in class, and turn in my best work.